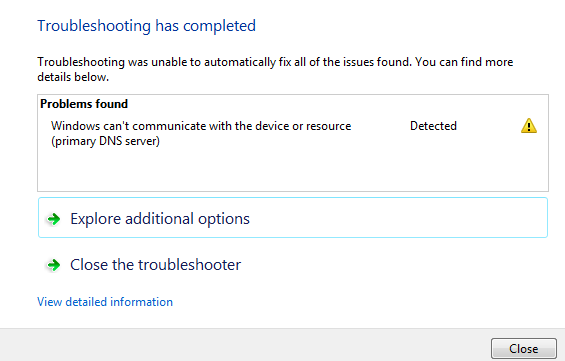
You will receive the error message “windows can’t communicate with the device or resource (primary dns server)” while your PC is not able to communicate with the Primary DNS server which was provided by the ISP (Internet Service Provider). This error message will be displayed under the Network Diagnostics process when you are not able to access the internet connection.
There are numerous reasons to receive this error message such as DNS server or Network settings might be temporarily unavailable, running with the help of a proxy server, or if the IPV6 or IPV4 settings may not be configured properly. You can follow the below-provided steps to resolve this issue.
Before following the troubleshooting steps, you need to disable the proxy server. Also, ensure that you need to walk through some guidelines in case if you are connecting to a restricted internet connection from any institutions such as University, College, etc.
Table of Contents
Updating IPv6 & IPv4 Settings
The IPv6 (Internet Protocol 6 version) has better and advanced features when compared with the IPv4 version. It can easily offer various numbers of addresses than IPv4. The IPv4 (Internet Protocol 4 version) can use on the packet-switched LLN (Link Layer Networks) which is also similar to Ethernet. It can only provide 4.3 billion addresses for usage.
The issue can be solved by updating both settings (IPv4 & IPv6) on your computer. This method can instantly solve this error message by following the easiest and simplest steps.
- From the Startup menu, click on the Run option and type in as Control Panel within the provided text box and click on the Enter button.
- Choose the Network and Internet option from the available list under the Control Panel window.
- From the upcoming window, choose the Network and Sharing Center option.
- The Internet connection which you are currently connecting will display on the screen and just click on the same.
- From the pop-up window, tap the Properties button.
- Within the available list, double-click on the option named Internet Protocol 6 version (IPv6) and enable both options Obtain DNS server address automatically and Obtain an IP address automatically.
- Click on the Ok button to apply or update the changes.
- Now, double-click on the next available option Internet Protocol 4 version (IPv4) and enable the same options and click on the Ok button to save the changes.
- Click on the Exit button and close all the windows.
Now, you can check whether you can connect to any internet connections successfully.
Reset Connection Settings with the help of Command Prompt
If the above-provided instructions do not work then you can follow the below steps to reset your connection settings. These steps will flush your DNS and IP configurations. Since your connection settings may not properly configure or corrupt. Access the command prompt using the Windows Administrator account and follow the below-provided commands.
- Access the command prompt from the startup menu by right-clicking on the application and choose the option Run as Administrator.
- From the existing black window, you need to type in the below commands one by one:
First command: ipconfig /flushdns
Second command: ipconfig /registerdns
Third command: ipconfig /release
Fourth command: ipconfig /renew
- After executing all the commands, close the command prompt and reboot your computer to apply the changes.
Now, the issue should resolve and you can connect to the internet successfully.
Resetting TCP/IP
If your TCP/IP or Internet Protocol (IP) might be corrupted ending up with receiving the “Windows can’t communicate with the device or resource (primary DNS Server)” error message. The Windows operating system is required to connect the internet connection successfully by using the main components named TCP/IP. In this scenario, it is not possible to transfer the data packets even if the link is working or internet connection is physically connected.
You can overcome this situation by resetting the TCP/IP protocol on your PC. Within the affected computer, you can download and install the Utility tool from the Microsoft official website. Please ensure that you are connected to a stable and active internet connection.
- Open up a web browser (either Google Chrome or Internet Explorer) and access the Microsoft’s official website.
- Download the Utility tool from the website.
- Double-tap the downloaded Utility Tool and press the Next button.
- You can follow the instructions provided on your screen to complete the process.
As an alternative option, you can process the same steps through the command prompt window. Access the command prompt from the startup menu and type in the following command: netsh int ip reset and hit the enter key. The process can also track under the log file (for e.g. netsh int ip reset c:\resetlog.txt). After performing the above steps, reboot your PC and check if you can connect to the internet connection successfully.
You may also like: How to Install Myvidster App for Android
Reset Network Device Drivers
You could also receive this error message with the possibility of having incorrect Network device drivers installed on your computer. Windows Update is used to update the entire available drivers on the automated process. If so, the currently installed or updated driver may not be supported or compatible for your computer. In case if the drivers are corrupted, you can give a try by rolling back the network device drivers to resolve this issue.
- Open up the command prompt and enter the keyword devmgmt.msc and tap the enter key.
- From the existing Device Manager window, choose the Hardware option from the Network Adapters selection.
- Right-click on the selected hardware device driver and select the option Uninstall.
- If your computer is UAC (User Access Control) protected then you need to grant permission to uninstall the driver.
- After completing the uninstall process, you can choose the option named Scan for hardware changes.
- Your hardware device driver will automatically detect by Windows and install the compatible driver on your computer.
Now, you can restart your PC and check for the issue. If the issue persists then you can try installing the current or latest network device drivers. You can install the current drivers by accessing the manufacturer’s official website. Ensure that you are installing the appropriate driver that is support or compatible with your computer specifications.
- Open up the Device Manager on your computer and access the Ethernet Hardware option.
- Click on the option Update Driver software and choose the 2nd option Browser my computer for the driver software. Search and locate the downloaded driver software and install the same.
Restart your computer and ensure that the installed adapter works successfully.
Restarting the Router & Modem
There are some possibilities that your internet modem or the router may update with the wrong configuration, which may lead to not function properly. Before resetting the modem or router with the hard-reset option, you can try restarting your router to check if it works perfectly.
- Take your modem or router and power it on to check whether all the ports are turned on.
- If not, you can find the reset button on the rear side of your router. A few routers do not have the reset button to perform the factory defaults feature. In this case, you need to use a thin pin to press within the available hole to reset the router.
- After resetting your modem or the router, try connecting your PC again to your Wi-Fi (wireless) network and check if you can connect to the Internet successfully.
You should know that after resetting your modem or router, it does not have a predefined password (SSID) and your Wi-Fi name will have a default name as similar to your router name. Also, the internet settings which you configure from the ISP (Internet Service provider) will automatically be removed from your device. So, be cautious while performing these steps.
In some cases, you need to contact your ISP support team for assistance to get the internet back working again. The devices which are already connected will be disconnected from the connection and it is required to re-connect them one by one.
Setting Google’s DNS
If the above-provided troubleshooting steps do not resolve the “Windows can’t communicate with the device or resource (primary DNS Server)” error message then you need to update the Google’s DNS settings manually. You can also try updating the Google DNS and check if you can connect to the internet connection. If these steps do not work then you can revert the DNS settings to the original state by following the similar steps:
- From the Startup menu, click on the Run option and type in as Control Panel within the provided text box and click on the Enter button.
- Choose the Network and Internet option from the available list under the Control Panel window.
- From the upcoming window, choose the Network and Sharing Center option.
- The Internet connection which you are currently connecting will display on the screen and just click on the same.
- From the pop-up window, tap the Properties button.
- Within the available list, double-click on the option named Internet Protocol 4 version (IPv4/TCP) and enable the option Use the following DNS server address.
- Change the DNS server as Preferred DNS Server: 8.8.8.8 and Alternate DNS Server: 8.8.4.4
- Click on the Ok button to save and apply the changes and exit from the properties window.
Then, reboot your PC and check if the issue persists.
It is also advisable to get the list of available DNS servers from your ISP (Internet Service provider) and try to apply the same. In case, if none of the DNS servers works then the issue could be with your Internet network and it is recommending to contact your ISP or network administrator for further assistance.
Scan for Malware
If you are still not able to connect to your internet network then it could be an issue with your computer that was infected by malware. In this case, you need to clean or scan the entire system. You can use the Windows Defender tool to identify any located malware and remove the same immediately from your computer. You can follow the below steps to scan your computer:
- Launch the Settings option from the Control Panel on your computer.
- Select the settings Update & Security.
- Choose the option named Virus & Threat Protection from the Windows Security selection.
- Click on the Run a new advanced scan icon.
- From the available list, enable the Full Scan option and click on the Scan Now button to execute the entire scan on your computer.
Once the scanning process is over, please check whether you can connect to your Internet network successfully.
Update the Hosts File
You can follow the below-provided steps to modify or update the Hosts file on your computer:
- Access the Windows Explorer on your computer and navigate to the following folder: C:\Windows\System32\drivers\etc.
- Open up the Hosts file using the Notepad application.
- Delete the entire content that is available within the Hosts file.
- After deleting the content, save the file. (Press Ctrl + S keys simultaneously to save the file).
Now, check if you are still getting the Windows can’t communicate with the device or resource (primary dns server) error message.
You can follow the above-provided troubleshooting steps to resolve the windows can’t communicate with the device or resource (primary dns server) error message on your computer. In case if you are still experiencing any issues, please contact your System Administrator or any expert for further assistance.